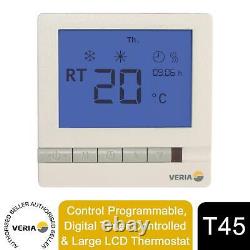
Veria Control T45 Programmable, Digital Timer-Controlled & Large LCD Thermostat


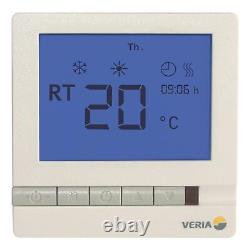
Veria Control T45 Programmable, Digital Timer-Controlled & Large LCD Thermostat. Veria Control T45 is a programmable thermostat with a timer that will allow you to regulate the temperature of your underfloor heating in accordance with the temperature of the floor, the air temperature in the room or a combination of these temperatures. The 5+2 day mode allows you to program the thermostat to match Your needs. Each day is divided into 4 individual time zones, each of which allows you to have the right temperature at the right time. Top-notch user-friendliness: The Veria Control T45 is an advanced, but easy to use, digital timer-controlled thermostat with a large LCD digital that can be used to control your floor heating via a floor sensor, room sensor, or a combination of the two.
Save energy: The Veria Control T45 is equipped with a weekday and weekend programme, both of which can be used to divide a given day into four time zones. Modern design: With its elegant and discreet design, and with a thickness of only 14 mm on the wall, the Veria Control T45 fits nicely in any room and in any home. Veria Logic Sensor (sensor check). Assignment of buttons and symbols on the display. Before installing the thermostat on the wall in the mounting box, open the front panel of the thermostat by gently pressing the latches located at the bottom of the thermostat.
Connect the wires according to the diagram (see below) and fix the thermostat in the socket with screws. Check that all connections are correct and reinstall the front. SELECTING THE TEMPERATURE CONTROL MODE. The Veria thermostat can control the underfloor heating system in the following modes.
Floor temperature control - mode 2: The heating element (cable/mat) is switched on and off based on the readings of the floor temperature sensor (the display shows the actual floor temperature at the location of the sensor). Room temperature control - modes 1 and 4: The heating element (cable/mat) turns on and off based on the readings of the room temperature sensor (the display shows actual air temperature at the place where the thermostat is installed). Floor and room temperature control - modes 3 and 5: The heating element (cable/mat) switches on and off based on the readings of the room air temperature sensor and the set maximum floor temperature (the floor temperature has priority over the air temperature).
Press the "Clock" and "Up" buttons at the same time for 6 seconds. The display will show the current operating mode of the thermostat. Use the "Down" and "Down" buttons to select the mode from 1 to 5 (see the table on the next page). After selecting the desired mode, do not press any buttons and the thermostat will automatically go into standby mode with new parameters. Press the "Clock" button once, the clock on the display will start flashing. Using the "Up" and "Down" buttons, set the hour. Press "Clock" again, the minute's display will start to blink. Using the "Up" and "Down" buttons, set the minutes. Press the "Clock" button again, the display of the days of the week on the display will flash. Use the " Up" and "Down" buttons to set the day of the week. After setting the day of the week, do not press any buttons and the thermostat will return to normal mode while maintaining the settings made.This function is mainly used for wooden floors and is only available in combined modes using a floor and room temperature sensor (modes 3 and 5). In this case, the limitation should not exceed 35°C. This value is set on the thermostat by default. If you select only floor temperature control mode with floor sensor (mode 2), the maximum floor temperature limit is set to 35°C and cannot be changed. Changing the maximum temperature limit floor (mode 3 and 5).
The thermostat must be turned off. Press and hold for 10 seconds. Button "M" until "Up" appears on the display. After that, release the "M" button and the display "SET" will appear. Now you can install using the buttons "Up" and "Down" limiting the maximum floor temperature (range from 20°C to 45°C). FLOOR TEMPERATURE DISPLAY (only for 3 and 5). The thermostat must be turned on. Press the "M" button once, the symbol will appear on the display "FT" and the displayed temperature will be the current floor temperature. In mode 2 (floor sensor), the display always shows the current floor temperature. In modes 1 and 4 (air temperature sensor) the display always shows the current room temperature is displayed. To enable this mode, the thermostat must be turned off. Press and hold for 3 sec. Set using the "Up" and "Down " buttons 01. When this mode is set and the thermostat is turned off, heating will be switched on if the floor/air temperature is below 5°C; heating will be turned off if the air temperature will be above 7°C. The display will show "Frost protection mode" Symbol. 13 A - 2,990 W at 230 V. Temperature - floor [°C] [Max]. Temperature - floor [°C] [Min]. Temperature - room [°C] [Max]. Temperature - room [°C] [Min]. Important Note: The thermostat must be installed by a qualified electrician. Box Contains: 1x Veria control T45 digital thermostat.
